Related Posts Plugin for WordPress, Blogger...

Saturday, July 30, 2011

I got featured!

Photobucket

A big thanks to Barbara for featuring me on her site and to all of you who have left comments, they are much appreciated! 

Tuesday, July 26, 2011

Neck pillow and blanket pouch


 If you're wondering why this pillow is less than perfect it's because it's stuffed with.....(scroll down)


 This!! 
My little girl couldn't decide if she wanted a neck pillow or a smallish pillow for the car so now she has some options, she can use the pouch as a pillow or use the blanket and neck pillow.
  
The back opens up so you can slip the blanket and pillow inside.


The bobble head sleeper is now the happy traveler


Tutorial

Draw your pattern and cut out, mine looked like this.
(Remember your pillow will be smaller than your pattern because of the seam allowance)

Pin on Fabric

Cut two
 (mine have a seam up the middle because they were to big so I trimmed them down)

 Sew right sides together using a stretchy stitch and hire a really cute kid to stuff with poly fill.


Pillow- pouch  Tutorial
I never knew making a pillow this way was sooooo easy!

Cut out a long rectangle.

 Hem both short edges

 Fold with about a 3" overlap in the middle and sew up the sides

 Turn right side out

Wasn't that easy!

 I used Cheapo dollar stored blankets for my neck pillow and case and saved an extra to use as a blanket.
Linking up with-

Making Monday Marvelous Linky Party


Saturday, July 23, 2011

Fun Beach Craft For Kids

Star Fish

I saw this idea in the family fun magazine and put my own little twist on it.

Scatter sea shells along the beach for kids to find.

Cut a star fish shape out of card board and put Elmer's glue all over until fully covered.


 Sprinkle sand all over

 Let dry and glue sea shells on top

 After your done take a big nap
In the Family Fun magazine they made their stars into little mermaid wands by gluing them onto a stick, we might do this later but this was enough fun for now.

Tuesday, July 19, 2011

Easy Apple Pie


Easy Apple Pie

This is my favorite apple pie in the whole world it is really good and super easy, don't let the long list of instructions fool you. 


CRUST
                         1 1/2 c. flour                          
1tsp salt
2 Tbsp cold milk
1 1/2 tsp sugar
1/2 c. cooking oil

Combine and mix ingredients well.  Pat into greased pie plate.

FILLING
4c. peeled, cored and sliced apples(7 to 9)
1/2 c. sugar
2 Tbsp flour
1/2 tsp nutmeg
1/2 tsp cinnamon

Combine all until apples are coated, pour into uncooked pie shell.

TOPPING
1/2 c. flour
1/2 c. sugar
1/2 c. chilled butter

Combine flour and sugar cut in butter and sprinkle on pie.
Bake @ 350 for 50 min. to an hour


Linking up with-

Monday, July 18, 2011


Cowboy Bandana Blanket
I made this blanket a while ago for my little boy, it is one of my favorites out of all the blankets I have made.  I used two pieces of fabric and had them machine quilted with a stitch that looked like a lasso.  As I was hemming I sandwiched little bandana triangles in between.(squares folded diagonally twice)

Thursday, July 14, 2011

How to make shirred sundresses


 I love the way these dresses turned out and  I was surprised to discover that shirring is really pretty simple.  I found a great basic shirring tutorial by Kathleen at Grosgrain and it worked like a charm.  You can find the tutorial here.  I did have to make a few adjustments to my tension and stitch length, I have a newer Bernina Machine and it bunched it up to much so I used a  2 1/2" stitch length and adjusted my tension to 6 and that seemed to be perfect, you kinda just have to play around with it because machines aren't always the same.

These dresses could have been a lot easier if I would have had enough of the same fabric, I had to piece mine together to get two dresses out of the different prints of fabric.  You can make these dresses out of a rectangle of  fabric and get the same effect.  Measure around chest and add about 4", sew a seam up the back,  hem both top and bottom, shirr and add straps.


And of course I had to make some matching hair clips from the leftover fabric.


Tuesday, July 12, 2011

Chip Bag Streamers

Make your own bike streamers
and the zebra stripe bike makeover
This picture doesn't do them justice when they are out in the light all you can see is the reflection off the silver side and they look really shiny.


To make the streamers you will need:
scissors
old chip bag
phillips screw driver

Cut up both sides of chip bag, tear bottom seam of bag apart and lay both pieces out flat.  Cut into about 1/4" strips or whatever you prefer leaving  1/2" at the top.  When the strips are all cut roll the top up and shove into the hole on the bike handle (if there isn't a hole just make one with the scissors) and shove the streamers in with the screw driver.  Mine have been quite sturdy if you are worried about them falling out you could put a dab of hot glue and then put them in. 


Zebra Stripe Bike
My little girl is now using her Dad's old bike which was all black and quite boring before.  We gave it a little make over with a can of hot pink spray paint, zebra stripes(sharpie marker) and some chip bag streamers. 
 I have to say it is pretty sassy now!

Wednesday, July 6, 2011

Diy Downeast Tank

My Latest Creation


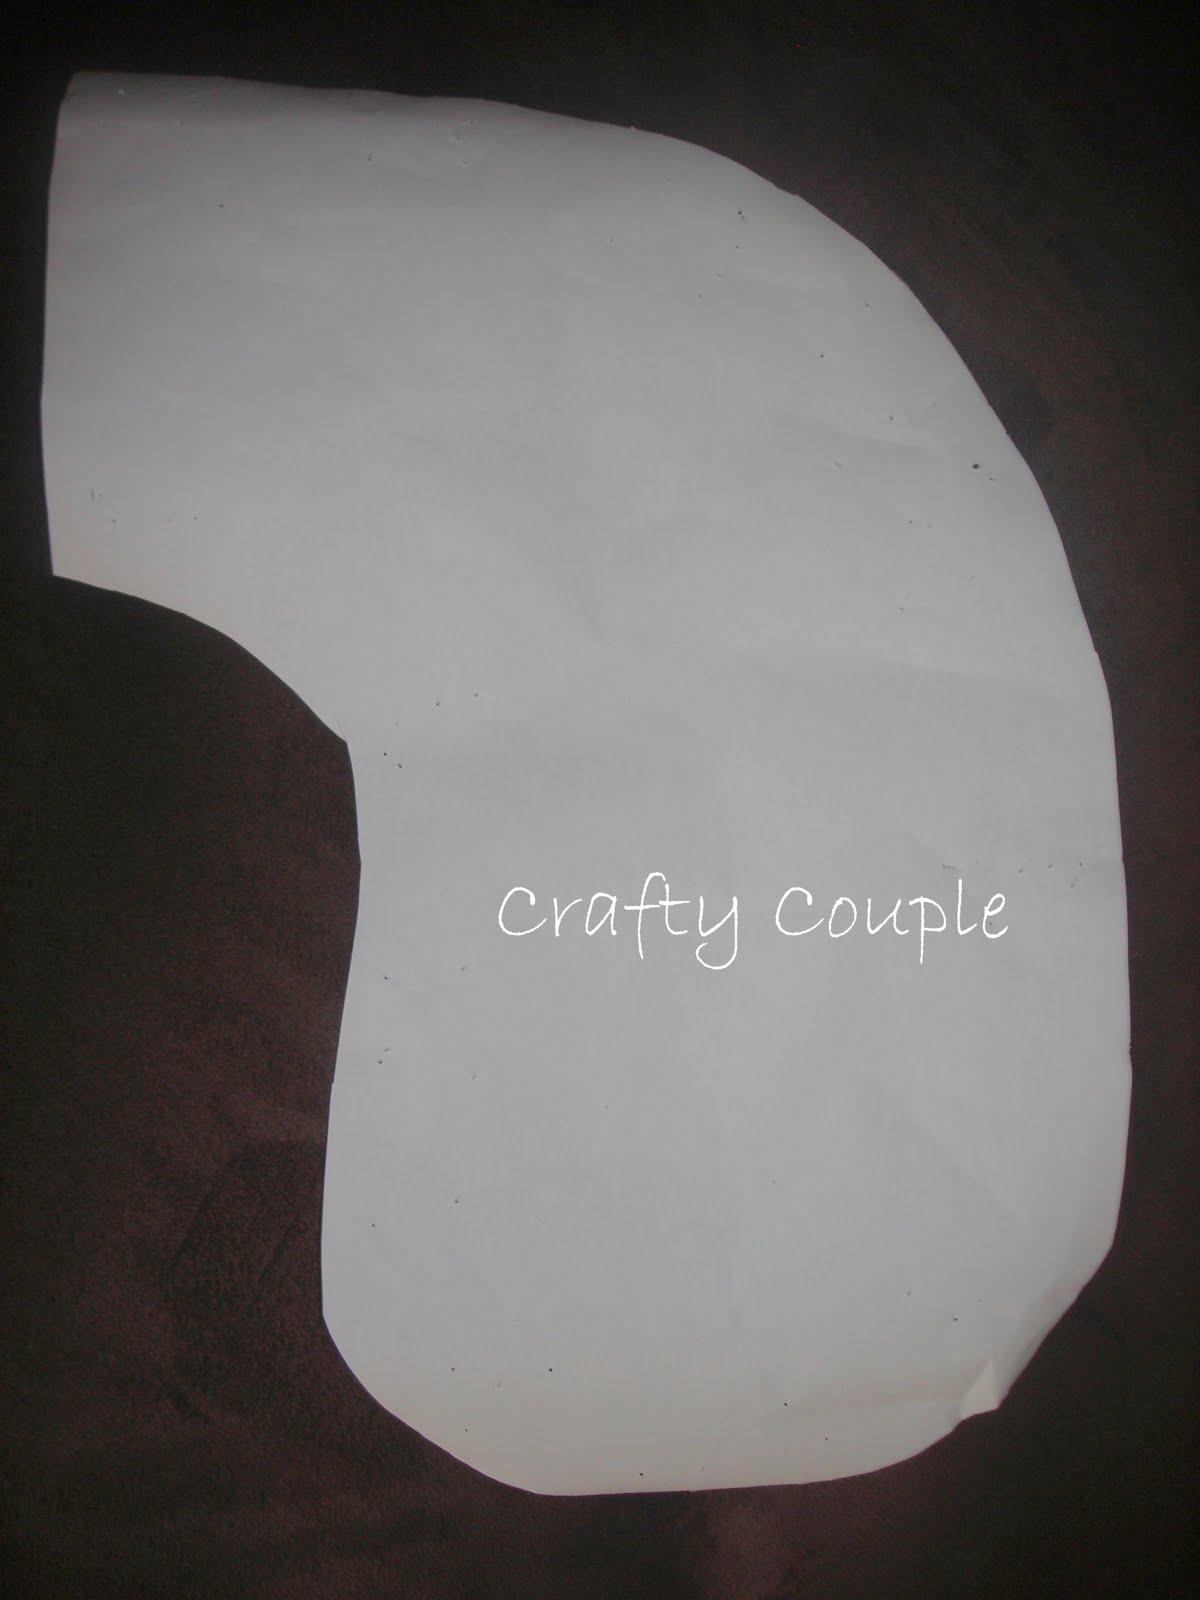
 I made my pattern from one of my favorite Downeast tanks, if you don't have one a regular tank top will work. Fold the tank top in half exposing the back and trace, fold in half the other way and trace the front, this neckline should be lower. 

Trace

Cut out


 Pin on fabric, (I recommend a stretchy knit fabric)  making sure the side of your pattern where your shirt was folded is on the fold of your fabric and cut.

 Pin both pieces right sides together and sew the shoulder and side seams, I used a stretchy stitch for this.

Cut a 1 1/4" strip of fabric long enough to sew around both sleeves and neck.  Fold in half the long way and sew right sides together creating a  tube, do this for each strip.  You should now have three tubes, fold the tubes in half the short way and sew around each sleeve and neck, this will give it a nice finished edge. 
 This sounds confusing but it's really not, feel free to email me with any questions.

Strip of fabric sewn together and folded in half.

Finished Sleeve


Now cut a bunch of 3/4 inch strips for your flowers roll into whatever kind of flower you fancy and sew onto shirt. I got lazy and hot glued mine, I will tack it down in a few places and hopefully it will hold up through the wash, I would recommend sewing them on.
(Don't forget to hem the bottom like I did, I will have to do that some time.)


01 02